Tuesday, September 15, 2015

Pump up the Pumpkin!


DIY Pumpkin Pie Spice

I'll never forget the time I was forced to spend $4.99 on the smallest jar of Pumpkin Pie Spice known to man. From then on, I vowed to never get caught without this spice blend during Pumpkin Season! 


4 T CINNAMON
2 T GINGER
2 t NUTMEG
1 t CLOVES
1 t ALLSPICE

Blend your spices in a jar of your choice, seal, and store to use as needed all season long! 


[gluten-free, vegan, allergy-friendly]
PUMPKIN GRANOLA 

Add a little fall flair to your lunch boxes this month! Use our basic Gluten-Free Granola Bar recipe (below), using 1 cup of pumpkin seeds as a mix-ins and adding 2 t Pumpkin Pie Spice.
Make this as bars or loose granola. 

(click for printable recipe)

What you need: 
scant 1/4 cup coconut oil + 1 T palm shortening to equal a full 1/4 cup
1/4 cup honey or maple syrup
1/3 cup coconut sugar
2 cups [gluten-free] QUICK cooking oats
1 cup of mix ins (use anything- seeds, chopped nuts, dried fruit- we used 1/2 cup hemp hearts + 1/2 cup chopped pecans. Just don't use chocolate, as it will melt.)
optional:
1 tsp vanilla (or extract of choice)
1 tsp cinnamon (or spice of choice)
2 T Enjoy Life brand chocolate mini-chips

What you do:
1. Mix your oats and mix-ins in a large bowl. Set aside. 
2. In a small pot, melt oil/shortening, honey and coconut sugar together over medium high heat until it comes to a bubble. Boil for about 30 seconds. 
3. Remove pot from heat. Stir in any extracts or spices and pour hot liquid mixture over dry ingredients. Mix very well to incorporate all ingredients. 
4. Pour into a lightly greased (or line with parchment paper) jelly roll pan and press out to be about 3/4 inch in thickness. This makes about 12 Little Piggy sized bars- so you won't use the entire jelly roll pan. Keep it packed together on one side of the pan. You really want to press them down so they stick together. 

5. Optional: While granola is still a little warm, sprinkle with mini chocolate chips and press them down. 
6. Cool to room temperature or until the chocolate chips are set before cutting into bars. Store at room temp in air tight container or freeze and thaw as needed. 

Notes:
To make loose granola, simply follow steps 1 - 3. Instead of pressing into bars, crumble your granola mixture and spread it out over a parchment lined baking sheet. It will stick together into bits of various sizes. Allow to cool to room temperature. Store the same as the bars. 


Piggy Playtime: How Does Your Garden Grow?

3890 Old Ranch Rd, Colorado Springs, CO
Saturdays 8 - 11 am (seasonally)

If you live in northern Colorado Springs, rejoice! We now have a local, organic garden for fresh veggies. Just north of Briargate, (right off Powers) The Shire Market also has convenient ready to go options, all at great prices. Be sure to bring your cash, shopping bag, and questions! The employees of this family owned property (run by Phelan Gardens) are helpful, patient, and informative. 


The Piggies learned to pick carrots! 

It was super exciting. 
They had a dance party in the green house, with all kinds of basil, tomatoes, and peppers. 
Most of the lettuce had gone to seed this season, but squashes are kickin!


Freshly picked, pre-packaged options. 

Eat Local! 
Ever wonder what to do with your haul? Give these farm to table recipes a try. 

Our picks from Saturday,  8/29:
tomatillos, banana peppers, kale, giant zucchini, spaghetti squash, various leafy greens


[gluten-free, paleo, vegan, allergy-friendly]
Roasted Salsa Verde
(click for printable recipe)

This easy, creamy twist on a regional favorite combines lightly roasted veggies with fresh avocado! Depending on the peppers you use, your flavor can range from mild to spicy. 

Roasted Salsa Verde
What you need:
2 red onions, peeled and quartered
1 lb tomatillos, peeled and rinsed
2 poblano peppers, hatch chiles, or jalapeños (you can mix & match here), sliced in 1/2 and deseeded
4 cloves garlic, peeled
1/2 t sea salt (or to taste)
1 t cumin
1 T avocado oil or other mild tasting oil
2 ripe avocados, remove seed and peel
1 t lime or lemon juice

What you do: 
1. Preheat oven to 450 degrees
2. Place onions, tomatillos, peppers, & garlic cloves on baking tray. Drizzle with oil and roast 15 minutes or until they begin to blister. 
3. Put roasted veggies in food processor and pulse until slightly chunky. 
4. Add seasoning and avocado. Pulse until avocado has been mixed in smoothly to the salsa. 
5. Add splash of lime or lemon juice and pulse to mix. 
6. Refrigerate in sealed container or freeze. 

[gluten-free, paleo, vegan, allergy-friendly]
(click for printable recipe)

This mock apple pie will fool your grandma! Made with a giant zucchini, instead of apples, makes it a much more economical treat and a sneaky way to get in those veggies. 


Z'apple Pie
What you need: 
10 - 12 cups chopped zucchini (peel & cut lengthwise, scoop out seeds, cut into 1/4 inch slices and then chop into pie sized pieces)
1 cup granulated sugar of choice
3/4 cup brown sugar or SUCANAT
1 1/2 T cinnamon
1/2 t nutmeg
1/4 t cloves 
or use apple pie spice of your choice
2 t cream of tartar
1 1/2 T arrowroot 
1/2 t sea salt
1 t apple cider vinegar
2 T ghee, butter, or cold coconut oil (in small chunks)
1/2 t sugar & 1/4 t cinnamon for sprinkling on crust

What you do: 
1. Preheat oven to 425 degrees.
2. Cook zucchini pieces in boiling water for a few minutes, until just tender. You do not want them too soft! 
3. Remove zucchini from stove, drain and allow to cool. Spread zucchini over several paper towels and press paper towels on top to squeeze out more water. 4.  
    Repeat until you've removed as much moisture as possible. 
5. In a bowl, toss zucchini with sugars and spices, cream of tartar, arrowroot and sea salt until well coated. 
6. Put your ready-bake pie crust in a 9 inch pie pan and poke some holes around the bottom. 
7. Fill pie crust with zucchini mixture. If you have a lot of liquid that settled to the bottom with your zucchini mix,   
    you'll want to put some of it into the pie crust, but don't overflow it. 
8. Dot the top of mixture with chunks of your ghee, butter, or cold coconut oil.
9. Drizzle vinegar over top of mixture. 
10. Gently place top pie crust, seal edges together, and poke a few holes in top. 
11. Brush crust lightly with water and sprinkle on the sugar & cinnamon. 
12. Bake for 15 minutes at 425. 
13. Place a parchment or foil liner over the edges of your crust to prevent burning (cut a hold out of a square piece of parchment or foil)
14. Reduce heat to 350 and bake for 45 minutes, removing the crust liner during the last 10-15 minutes . 


[gluten-free, paleo, vegan, allergy-friendly]
(click for printable recipe)

Kale is the ultimate green leafy veggie. You can sneak it into smoothies, sauté it with onions and garlic, add it to your favorite soups or bakes...or eat it like a chip. Now, go get crunchin!


Kale Chips
What you need:
1 bunch of kale, rinsed/dried/de-stemmed & cut into somewhat uniformed sized pieces. 
liquid oil for drizzling
desired seasonings

What you do:
1. Preheat oven to 375 degrees
2. Toss prepared kale leaves in a little bit of oil. You just want them lightly coated, not soggy. 
3. Toss oiled leaves in seasoning of choice 
4. Lay leaves in a single layer on a baking pan and bake for about 10 - 15 minutes or until crispy (but not burned!). For more even crisping, toss your kale chips several times during baking. 

Friday, September 4, 2015

All about Otto's [Natural Cassava Flour]

PRODUCT REVIEW


What is Otto's Natural Cassava Flour
It's a whole yuca root, dried & ground, to make a flour. It's gluten & nut-free, which makes it a good choice for allergy-free baking. Note: Tapioca is also made from yuca but just the starch and it's bleached. Tapioca starch and cassava flour are definitely two different products with different baking properties and cannot be subbed out for one another.

What I love about Otto's:
It's easy. Rather than having a gluten-free recipe with 5 different flours, this cassava flour can replace most of them and subs pretty darn close to 1 for 1 with wheat flour. The Urban Poser actually broke it down into weight, if you want to get technical about it. Cassava is heavier (140 g per cup) than wheat flour (120 g per cup) so it's more like 3/4ish cup cassava to 1 cup wheat. Grab a kitchen scale and WEIGH IT for best results in baking.

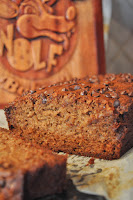
Nut-Free Paleo Banana Bread
from Merit + Fork
Anyway, if you're not overly picky, you can use it in place of wheat flour in your old favorite recipes and get somewhere between an edible to enjoyable result without much hassle.  But if you're more into perfection (Hi, my name is Karin.), then you can research recipes and experiment by mixing it with different ingredients to get a really satisfying baked good. You will have the texture of wheat flour and a similar flour-like favor that will bring back a flood of fond memories from when your days were gluten-filled instead of gluten-free. That's pretty much what this Merit + Fork banana bread did for me, at least.

Additionally, I love that cassava flour is nut-free because I have a lot of customers who can't have nuts. My son's classroom is also nut-free, so this is an excellent way to bake nut-free items that are just as delicious as my coveted almond meal creations.

Why I don't always choose cassava flour...
As a personal preference, I find that cassava can have an overly flour-y flavor and/or a gummy texture if the recipe isn't juuuust right. And since I have a huge arsenal of other tried & true recipes with other flours, I tend to stick to what I know. However, that's just going to be a process of trial and error and up to your own tastebuds to decide what you think of it! If I had more time & opportunity to tweak recipes to my standards, it might definitely would play a larger role in my kitchen.

However, the main reason that it's not my go-to flour for all things is that my tummy doesn't react favorably certain starches (and cassava is much more carb-y and starchy than other grain free flours I use like almond meal or coconut flour), so I generally only choose it for specific recipes that I know it truly works the best in or if nut-free is required...

...except for this week, of course, when ev-er-y-thing was coming up OTTO'S! I'm not quite back in business yet AKA I have TIME on my hands, so I placed a big order to experiment with (it's only available on-line, currently) and was having too much fun as recipe after recipe turned out wonderfully! I ended up having a full blown bake-a-thon to stock our freezer with lunch box options. Below, you'll find the links to the recipes that I tried (and the Little Piggies loved).

(topped with Enjoy Life Foods chocolate mini-chips) 

This loaf turned out great. The recipe is simple and the final product is moist and springy with great flavor. I used 1/2 the sugar and supplemented with some granulated stevia. So it sweet enough for dessert, minus all most the sugar.  I also used coconut oil instead of butter or ghee. 


After the banana bread turned out so well, I wanted to try something a little more seasonal to say "HELLOOOOO, SEPTEMBER!". But instead of a loaf, I wanted some mini-muffins for on-the-go breakfasts, snacks, and lunches without (most of) the mess of a slice of a loaf. The result was a perfect cake/bread hydrid and just the right size for the lunch box. 
NOTE: The recipe uses ginger because I was out of cinnamon. Feel free to use a pumpkin pie spice. 

Ginger Pumpkin Bread [mini-muffins]

What you need:
6 T room temperature palm shortening (or butter)
150 g cassava flour or approx 1 cup + 1 T with a "scoop and sweep" method
*use weight for best results
1/2 t baking soda
1 t ginger (or spices of your choice)
1/2 t sea salt
1/2 cup to 1 cup coconut palm sugar (or granulated sugar of choice) 
*you can supplement up to 1/2 of the sugar with a granulated stevia
1/2 can pumpkin puree
2 large eggs

What you do:
Preheat oven to 375 (or 350 if not at high altitude. Use convect back if you have that option)
Whisk wet ingredients in a medium to large bowl. 
Slowly whisk dry ingredients into the wet mixture. 

Bake in mini-muffin tins for 10-15 minutes or when cooked through and spring back to the touch. 
Makes approx 30 mini-muffins. 


Even if there was nothing else (which isn't the case, but hypothetically speaking..), THIS bread would be the sole reason for me to continue to stock Otto's Natural Cassava Flour in my pantry.   I'm no bread baker, but I've tried quite a few recipes in my day with quite a few A LOT of different ingredients/flours and nothing has come close to this. 


The only flour in this recipe is cassava. There is no yeast, no proofing or rising or kneading. You don't even need a stand mixer. Just ONE bowl and you can mix everything sufficiently by hand. It's springy and soft, like a wheat sandwich bread, with a barely there crust. Yep! THIS is my kind of bread. And while we are not a bread obsessed family, I think I can feel OK about stocking my freezer with slices of this. 

Bottom line: 
Otto's Cassava Flour, when used in a great recipe, will yield great results and is totally worth the extra starch and carbs (if you can handle it). It's as close the taste and texture of traditional wheat flour that you're gonna get with grain & gluten-free baking. It's also nut-free for an added bonus. 

Otto's Naturals has FREE SHIPPING on all orders and offers a variety of size bags, making it very reasonable to be able to try this flour to see if it's for you. 

You may also like...
*I like my tortillas slightly thinner and don't follow this recipe exactly, but it's still great! And if you make them big enough, you cook a batch and then stuff them with whatever you want to fry up empanada style in some hot oil. They get crispy on the outside but still remain chewy. 
*Jennifer from predominantlypaleo.com is the "Yuca Queen" and actually works with the whole root. She gives the whole run-down on using the whole yuca vs flour on her blog!